Running calculation files in a virtual machine will cause the virtual disk to expand and take up too much disk space. At this time, you can transfer the calculation files to the host disk by mounting the host folder, avoiding the problem of virtual disk expansion. Creating a shared folder in Windows is omitted here. You only need to ensure that the virtual machine can access the host through the IP address.
1. Check the resource path
The following command checks the resource path shared by the server and confirms the mount point:
smbclient -L 172.25.64.1 -U ${username}

//172.25.64.1/Share
2. Mounting method
To access Windows shared folders in Ubuntu, you must first install the cifs tool:
sudo apt install cifs-utils
Then mount the shared folder using the mount command:
sudo mount -t cifs //172.25.64.1/Share /mnt -o username=${username},password=${password}
Here, the IP address 172.25.64.1 is the gateway address of the host machine accessed in the virtual machine, Share is the folder shared by the host machine, and /mnt is the local access path of the virtual machine to be mounted. Replace ${username} and ${password} after the command with the access username and password.
It should be noted that the username of the local Windows user needs to be written in the form of ${computer name}\${username}, connected with a backslash, for example: xxx-desktop\administrator. If it is an online account, you need to fill in the full email account name.
If the password contains special escape characters such as commas, the command line should not contain ,password= and the following content, and then enter the password according to the prompts to log in.
If there is a problem with no read or write permissions, add dir_mode=0777,file_mode=0777 to the mount command:
sudo mount -t cifs //172.25.64.1/Share /mnt -o dir_mode=0777,file_mode=0777,username=${username},password=${password}
If you want to add read and write permissions only for certain users, specify the user and group by uid and gid:
sudo mount -t cifs //172.25.64.1/Share /mnt -o uid=user,gid=group,username=${username},password=${password}
You can view the mount status through the mount command:
mount | grep cifs

Unmount via the umount command:
sudo umount /mnt
If you want to mount automatically when booting, you need to edit /etc/fstab, the content is as follows:
//172.25.64.1/Share /mnt cifs auto,dir_mode=0777,file_mode=0777,username=${username},password=${password} 0 0
3. Special character passwords
If the password contains special escape characters, you can use the following methods to automatically mount Windows shared folders when Linux boots up1:
-
Create a credential file: To keep the password secure, it is best to save the Windows shared username and password in a file that only root can access, such as:
/etc/cifs-credentials, and make sure its permissions are set to be readable only by root.sudo touch /etc/cifs-credentials sudo chmod 600 /etc/cifs-credentials -
Use a text editor to edit the file. If the password contains special characters, enter them directly in the file (without escaping). Write the username (xxx-desktop\administrator) and password (123456,abcde):
username=xxx-desktop\administrator password=123456,abcde -
Edit the
/etc/fstabfile: Open the/etc/fstabfile and add the following content at the end of the file to include the mount information://172.25.64.1/Share /mnt cifs credentials=/etc/cifs-credentials,iocharset=utf8,file_mode=0777,dir_mode=0777 0 0Note that the encoding of the /etc/cifs-credentials file needs to be UTF-8.
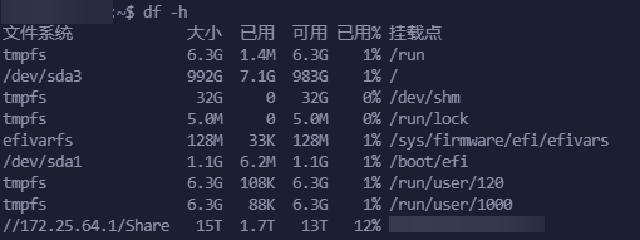
The above completes the automatic mount setting at boot time. You can verify it through df -h after restart.

4. Permission issues
When using cifs to mount Windows shared folders, commands such as chmod and chown are invalid, and the permissions of the mounted files and folders cannot be adjusted. Here, NFS (Network File System) is used to mount shared folders to solve this problem.
By default, NFS does not provide any authentication mechanism, so there is no need to verify the username and password, which poses a certain security risk. NFSv3 completes authentication based on the client IP address2, and security can be improved by specifying the client IP address.
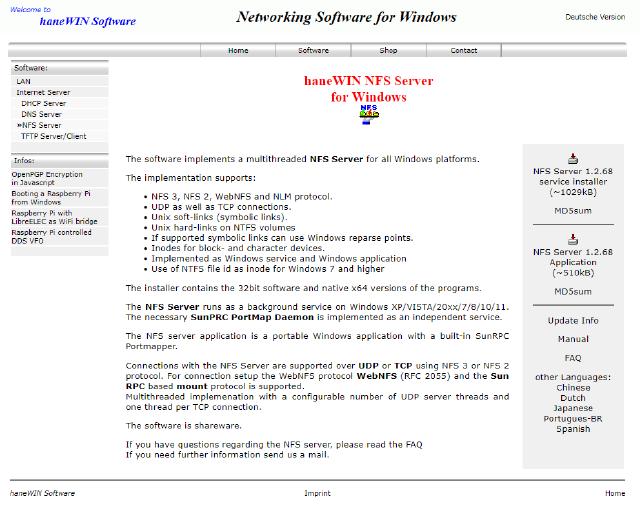
Windows 10 can create NFS shared folders through the third-party tool haneWIN3. Download and install it and configure it through the graphical interface. I will not go into details here, but you can refer to other related articles4. Note that after the configuration is completed, the relevant ports must be opened in the firewall.

Install NFS related tools on Ubuntu and enable related services:
sudo apt install nfs-common rpcbind
sudo systemctl start rpcbind
sudo systemctl enable rpcbind
Use the mount command to mount the shared directory. Note the -t nfs at the end:
sudo mount -t nfs 172.25.64.1:/Share /mnt
The unmount command is the same as cifs. When the network status is suddenly interrupted, you can add the -lf switch:
sudo umount -lf /mnt
Edit /etc/fstab and add automatic mount at boot:
172.25.64.1:/Share /mnt nfs defaults,_netdev 0 0
